> ## Documentation Index
> Fetch the complete documentation index at: https://docs.dintero.com/llms.txt
> Use this file to discover all available pages before exploring further.

# Add a user in Dintero Backoffice

> How to invite team members to your Dintero Backoffice account and set their access level.

You can invite multiple users to your Dintero Backoffice account and control what each person can access. Users can process transactions, view reports, and send payment links.

<Note>
  Sending payment links requires desktop access to Backoffice.
</Note>

## Invite a team member

<Steps>
  <Step title="Open the Team settings">
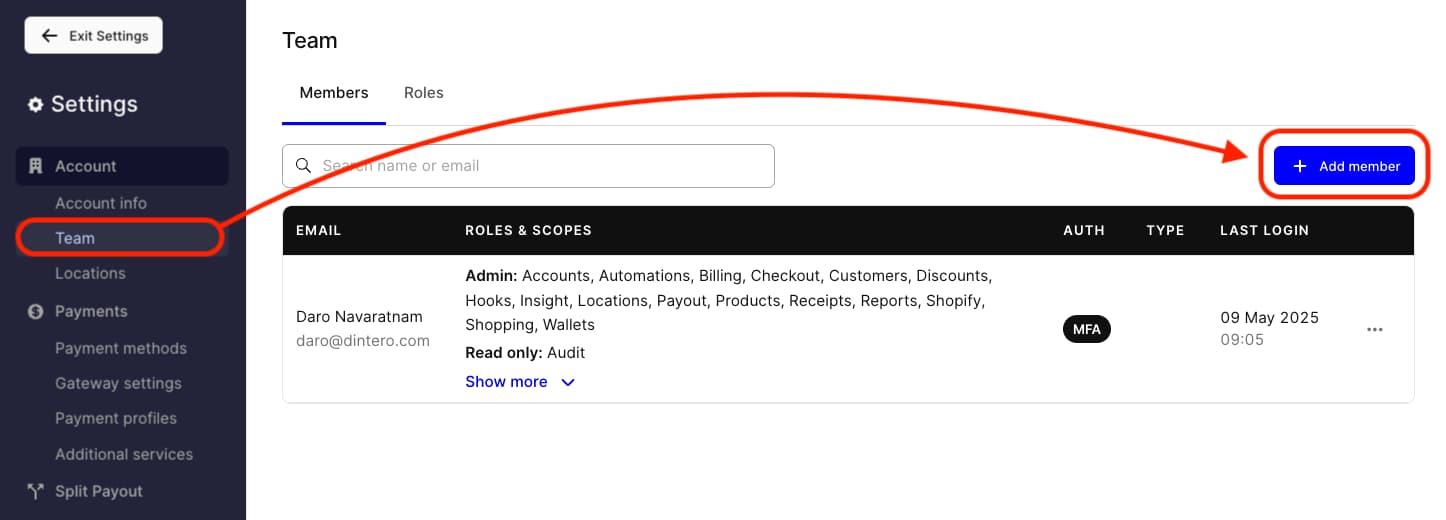
    In [Dintero Backoffice](https://backoffice.dintero.com), go to **Settings** > **Team** and click **Add member**.
    <Frame>
      <img src="https://mintcdn.com/dintero-c3a7bfec/5SNT3w02xCre3YZI/docs/assets/support/add-user-step-1.jpg?fit=max&auto=format&n=5SNT3w02xCre3YZI&q=85&s=c3f61c4fd38fa8ec4017afc3085e7709" alt="Team page in Dintero Backoffice with Add member button highlighted" width="1446" height="520" data-path="docs/assets/support/add-user-step-1.jpg" />
    </Frame>
  </Step>

  <Step title="Enter the email address">
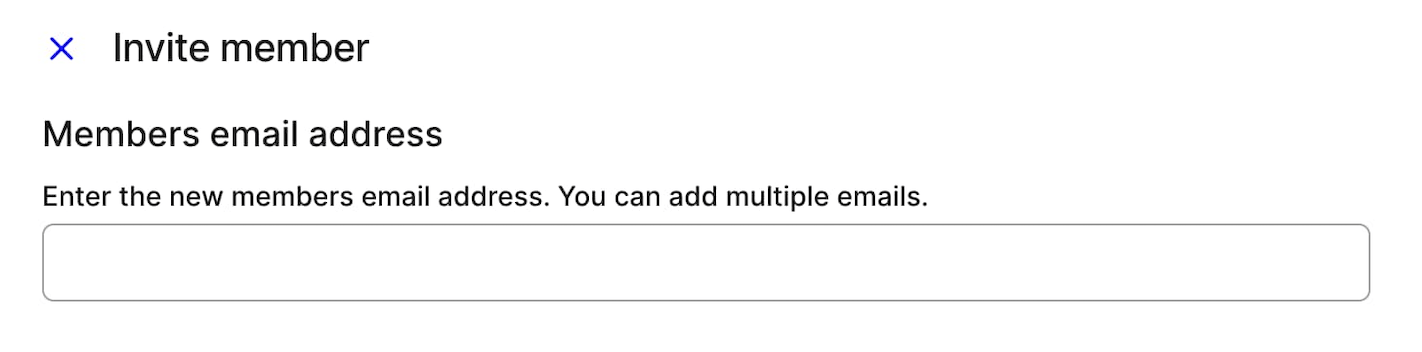
    Type the new member's email address in the field. Press Enter to add it. You can add multiple addresses at once.
    <Frame>
      <img src="https://mintcdn.com/dintero-c3a7bfec/5SNT3w02xCre3YZI/docs/assets/support/add-user-step-2.png?fit=max&auto=format&n=5SNT3w02xCre3YZI&q=85&s=f89211d944b65f24f2ccc137239887f2" alt="Invite member form with email address field" width="1422" height="352" data-path="docs/assets/support/add-user-step-2.png" />
    </Frame>
  </Step>

  <Step title="Set their access level">
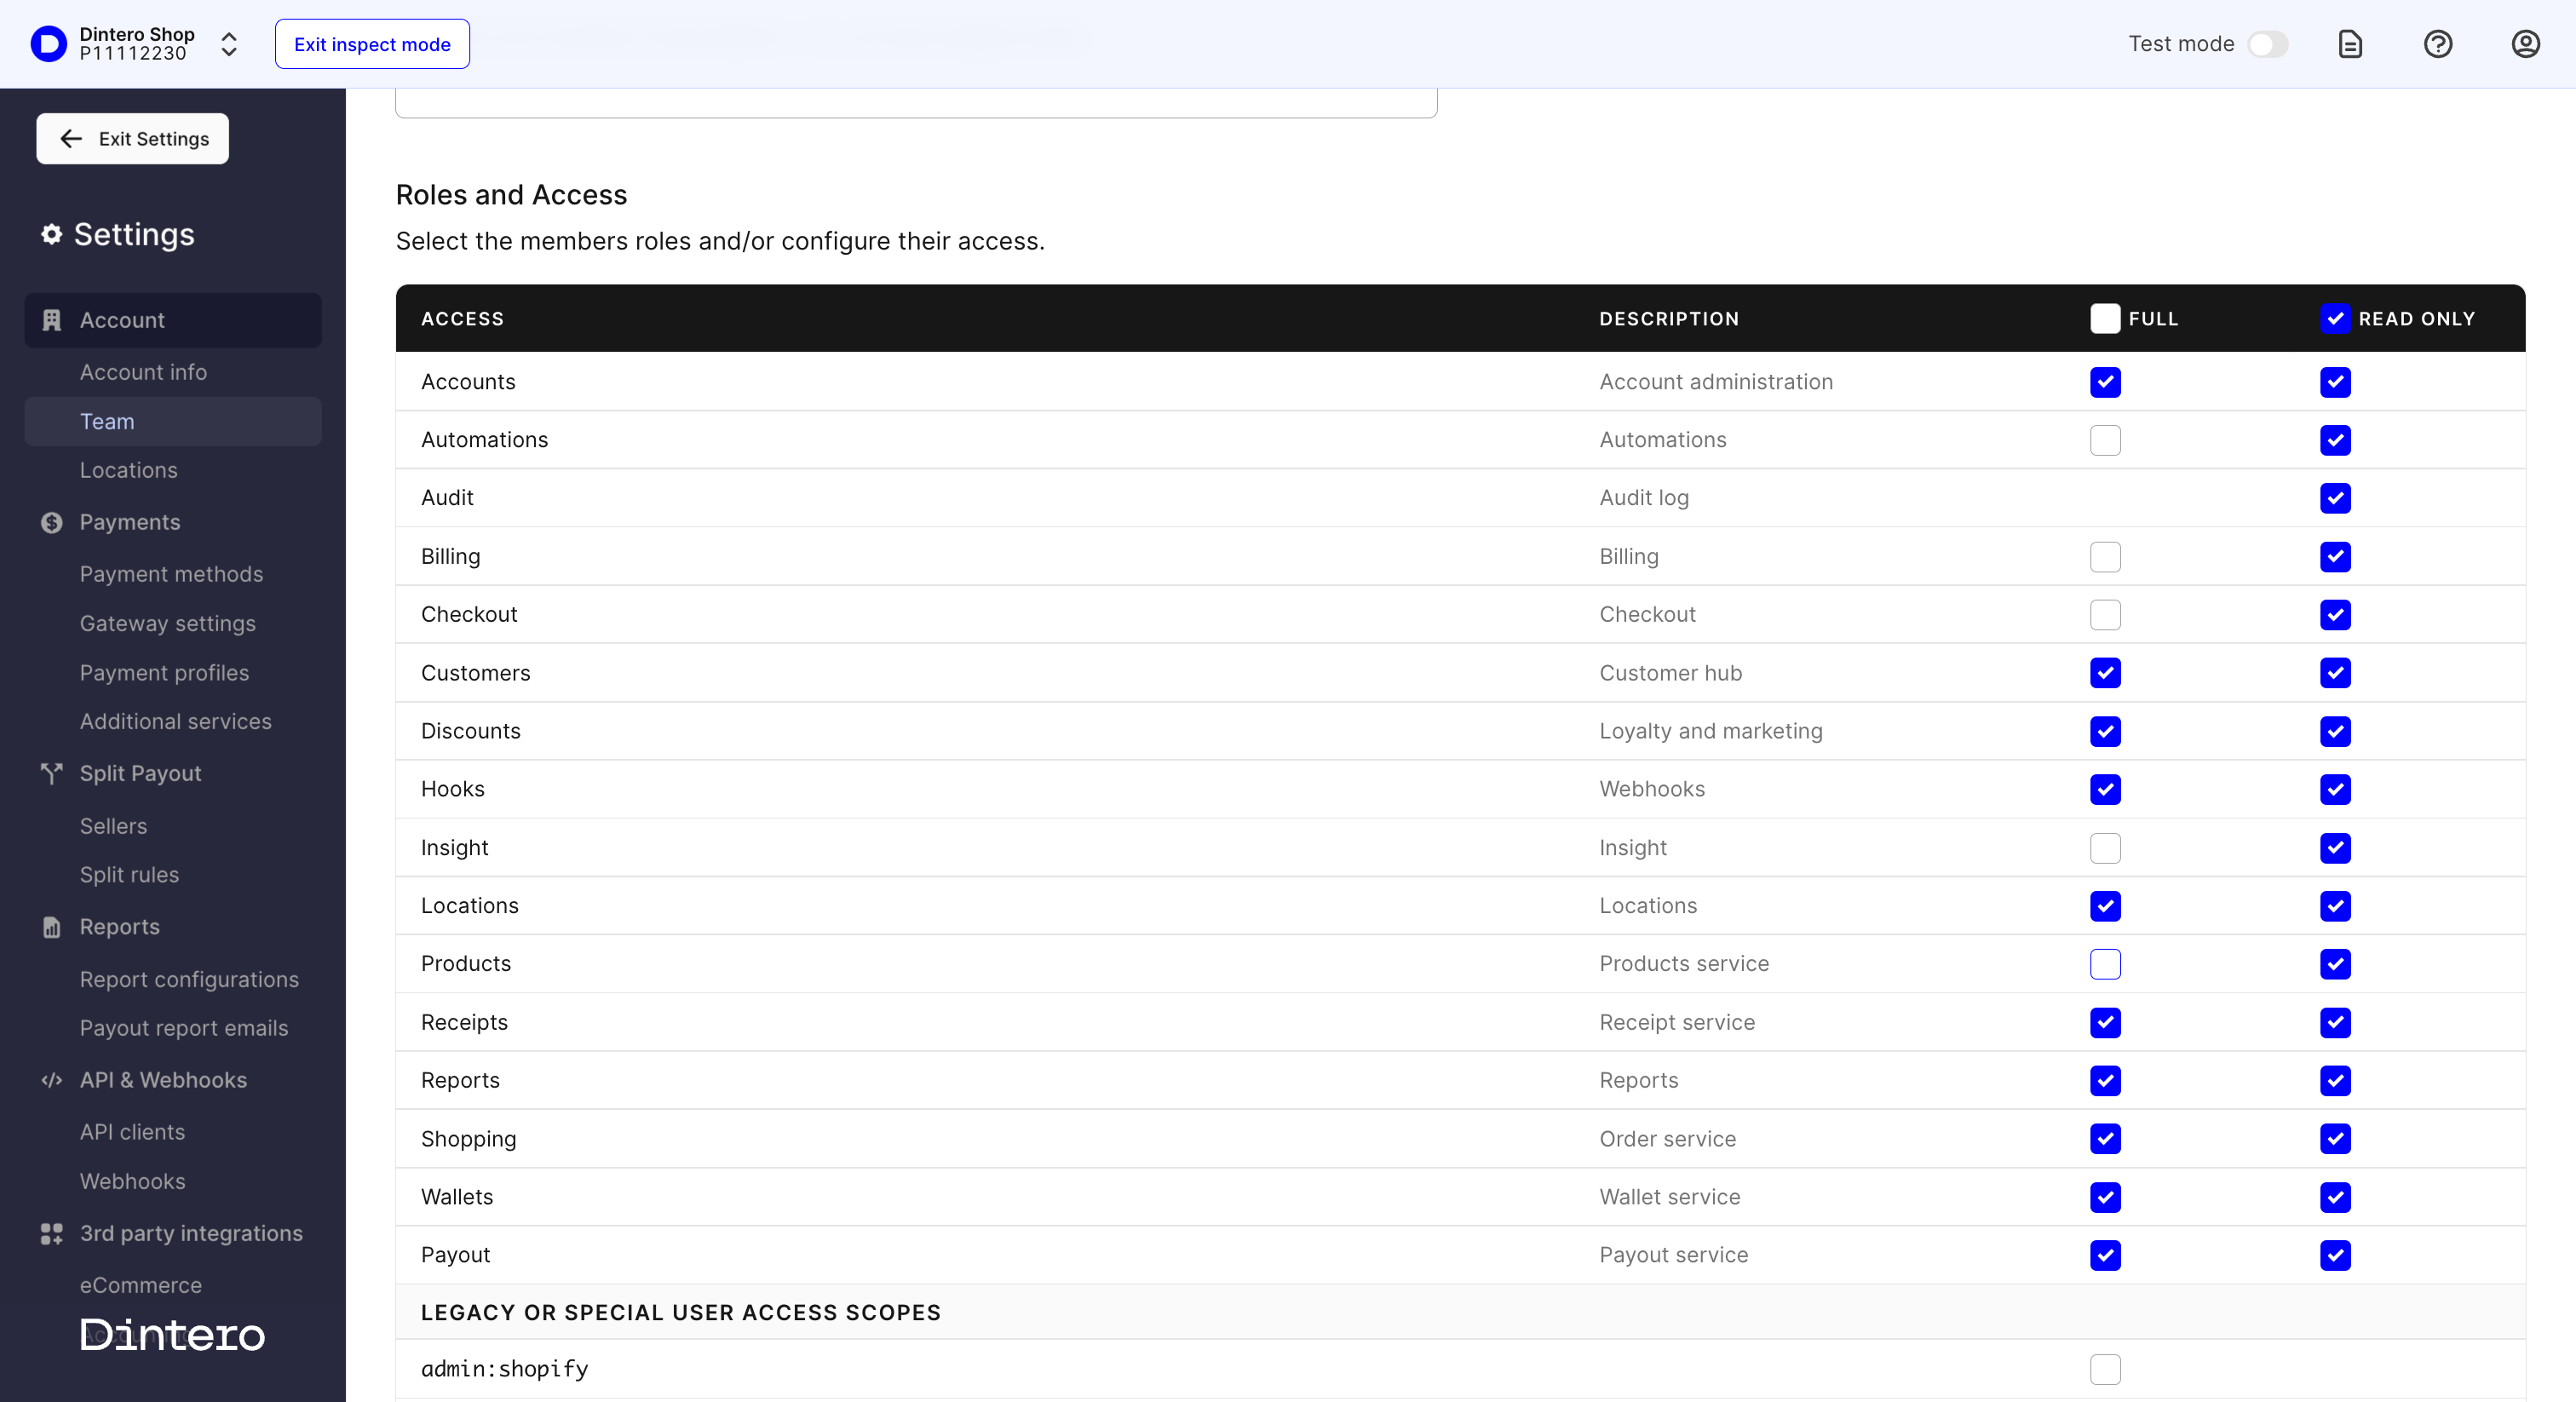
    Select the roles and scopes for the new member. Each scope can be set to **Full** or **Read only**.
    <Frame>
      <img src="https://mintcdn.com/dintero-c3a7bfec/5SNT3w02xCre3YZI/docs/assets/support/add-user-step-3.png?fit=max&auto=format&n=5SNT3w02xCre3YZI&q=85&s=1b97e9bdad2cc60d67011d560fc137e1" alt="Roles and access selection screen showing Full and Read only columns" width="3024" height="1646" data-path="docs/assets/support/add-user-step-3.png" />
    </Frame>
  </Step>

  <Step title="Send the invitation">
    Click **Invite member**. The user receives an email invitation to join the account.
    <Frame>
      <img src="https://mintcdn.com/dintero-c3a7bfec/ADcpsKo9Wt_JnotC/docs/assets/support/add-user-step-4.png?fit=max&auto=format&n=ADcpsKo9Wt_JnotC&q=85&s=982c40a428186f786f31eabf202191c7" alt="Invite member confirmation button" width="468" height="152" data-path="docs/assets/support/add-user-step-4.png" />
    </Frame>
  </Step>
</Steps>
