WooCommerce Guide
How to install the Dintero Checkout for WooCommerce plugin
Step 1 - Install the plugin
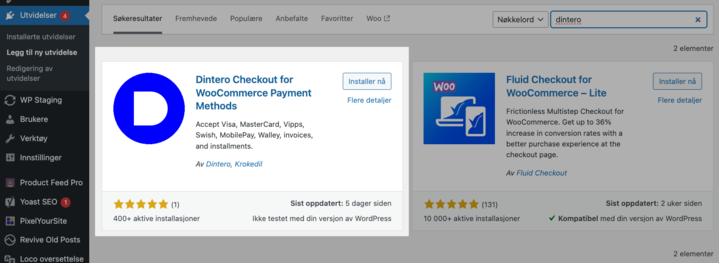
- In Wordpress, go to Plugins, then click Add new
- Click the search bar and type Dintero
- Click on the Dintero plugin, then Install Now and Activate

Step 2 - Connect your Dintero account to WooCommerce
- In WordPress, go to WooCommerce → Settings → Payments
- Click Enable on the new Dintero plugin
- Click Manage one the new Dintero plugin
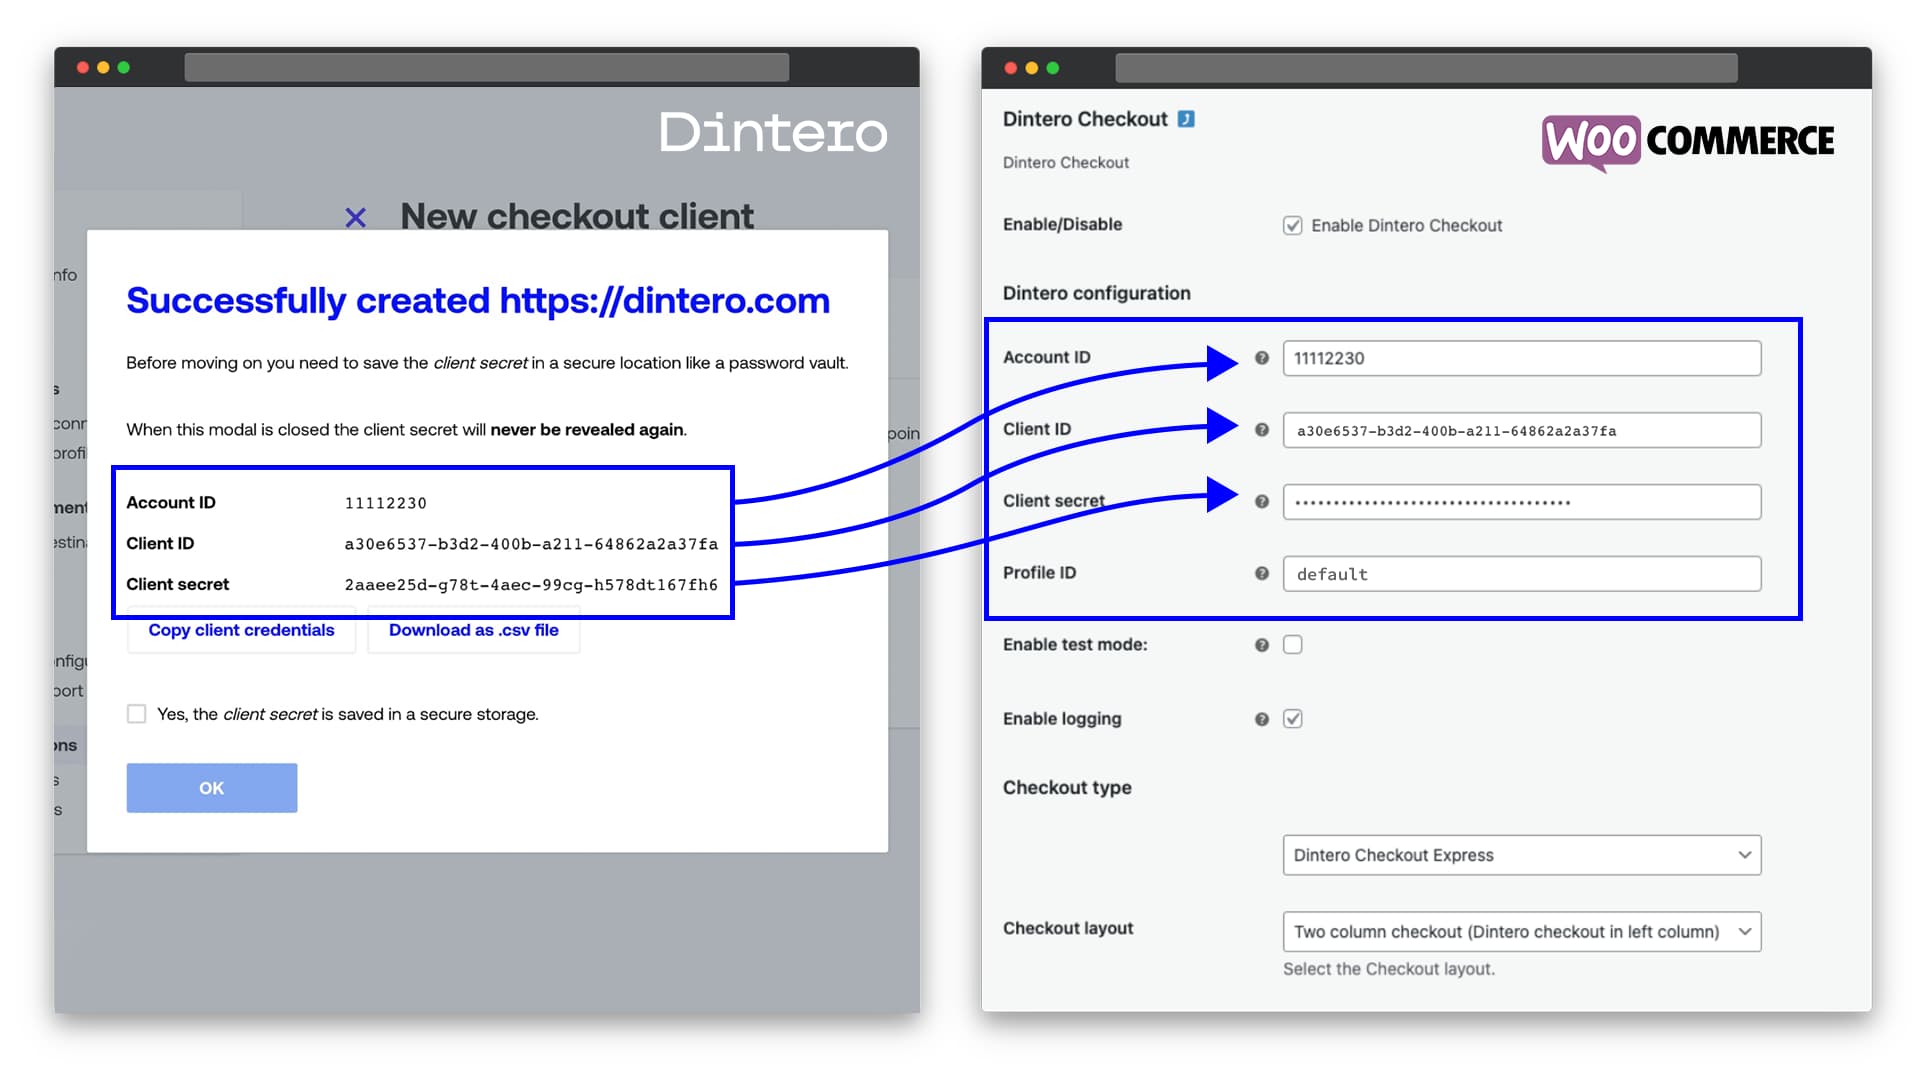
- Open Dintero Backoffice in a separate browser tab, and create your API keys. (If you don't yet have a Dintero account, create one here). Then paste your API keys into their respective fields in the Dintero plugin in WooCommerce, as shown below.

Step 3 - Final touches
You just have a few more settings to set in order to make sure everything will work perfectly.
- In Wordpress, go to WooCommerce → Settings → General → Number of decimals and set value to 2.
- Turn off tax rounding by going to WooCommerce → Settings → Tax → Rounding and make sure Round tax at subtotal level, instead of rounding per line is turned off.
If you dont use a firewall, skip the next step.
- If you know you've set a firewall to protect your website, we need to allow Dintero Checkout to be accepted by your site by opening for traffic from Dintero. This is done by letting through the following IP adresses:
Congratulations! 🎉🥳
You've now successfully installed the Dintero Checkout for WooCommerce plugin. If you've gotten your application for payment methods approved, you can now start receiving payments.